To use the self-cleaning feature on your oven, remove the racks and any excess food debris. Then, follow the manufacturer’s instructions for setting the cleaning cycle and ensure proper ventilation.
Self-cleaning ovens are a convenient way to maintain a clean cooking appliance without the need for harsh chemicals or extensive manual scrubbing. By following the correct procedures, you can effectively remove built-up grease and grime, leaving your oven sparkling and ready for your next culinary adventure.
Understanding the best self-cleaning oven instructions can help you make the most of this convenient feature while ensuring the long-term performance of your appliance. Keep reading to discover the steps involved and tips for a successful self-cleaning cycle.
Introduction To Self-cleaning Ovens
Self-cleaning ovens have revolutionized the way we clean our kitchen appliances. Gone are the days of spending hours scrubbing away at stubborn grease and grime. These innovative ovens are equipped with a self-cleaning function that uses high temperatures to reduce food residue to ash, which can then be easily wiped away. In this blog post, we’ll explore the magic of high temperatures, key features, and benefits of self-cleaning ovens.
The Magic Of High Temperatures
Self-cleaning ovens utilize incredibly high temperatures, typically around 900°F, to effectively burn off food residue and grease. During the self-cleaning cycle, the oven locks its door and heats up to such extreme temperatures, turning any leftover food particles into ash. Once the cleaning cycle is complete and the oven has cooled down, all that’s left is to wipe away the ash, leaving the interior sparkling clean.
Key Features And Benefits
- Time-Saving: Self-cleaning ovens save you valuable time and effort, eliminating the need for manual scrubbing and cleaning.
- Energy-Efficient: The self-cleaning function is designed to be energy-efficient, using high temperatures for a specific duration to minimize energy consumption.
- Improved Safety: By locking the oven door during the self-cleaning cycle, the risk of accidental burns or exposure to high temperatures is minimized, enhancing safety.
- Enhanced Hygiene: The thorough cleaning process ensures that the oven is free from food residue and bacteria, promoting a hygienic cooking environment.
- Longevity: Regular use of the self-cleaning function can contribute to the longevity of the oven, preventing the buildup of tough stains and residues that could affect performance.
Types Of Self-cleaning Ovens
When it comes to self-cleaning ovens, there are two main types that you should be aware of. Each type employs a different cleaning mechanism, catering to varying user needs and preferences. Let’s delve into the specifics of pyrolytic and catalytic ovens.
Pyrolytic Ovens: Turning Grime Into Ash
Pyrolytic ovens feature a high-temperature cleaning cycle that reaches around 900°F. During this process, any food residue or grease inside the oven is turned into ash, which can then be easily wiped away. The intense heat effectively burns off tough stains, leaving the interior spotless without the need for harsh chemicals.
Catalytic Ovens: Continuous Cleaning
Unlike pyrolytic ovens, catalytic ovens use a specially coated interior to continuously absorb and break down food splatters and grease at lower temperatures. The catalytic liners are designed to oxidize and dissolve cooking residues each time the oven is used, ensuring a cleaner cooking environment with minimal effort.
Preparing For The Self-cleaning Cycle
Before initiating the self-cleaning cycle on your oven, it is important to properly prepare the appliance to ensure optimal results. Taking a few simple steps beforehand will help you avoid any potential issues and make the cleaning process more efficient. In this section, we will guide you through the necessary preparations, including removing oven racks and accessories, as well as wiping down any excess spillage.
Removing Oven Racks And Accessories
Prior to starting the self-cleaning cycle, it is crucial to remove all oven racks and accessories. This step is necessary to prevent any damage to these items and to ensure that they do not interfere with the cleaning process. Follow these steps to remove the oven racks:
- Open the oven door and locate the racks inside.
- Gently slide each rack towards you until it reaches its furthest point.
- Lift the front part of the rack and carefully pull it out of the oven.
- Repeat this process for each rack until all of them have been removed.
Remember to set the oven racks aside in a safe location, away from any heat or potential damage.
Wiping Down Excess Spillage
Before starting the self-cleaning cycle, it is essential to wipe down any excess spillage or debris inside the oven. This will prevent any unpleasant odors or smoke during the cleaning process. Follow these steps to effectively clean the oven:
- Allow the oven to cool down completely before attempting to clean it.
- Using a damp cloth or sponge, wipe away any visible spillage or residue on the oven walls and bottom.
- For stubborn stains, you can use a mild soap or oven cleaner specifically designed for self-cleaning ovens.
- Make sure to rinse off any cleaning solution thoroughly to prevent it from interfering with the self-cleaning cycle.
- Dry the oven with a clean cloth or allow it to air dry before proceeding.
By following these instructions, you will ensure that your self-cleaning oven is ready for the cleaning cycle, allowing it to effectively remove any built-up grime and grease. Remember to always consult your oven’s manual for specific instructions tailored to your appliance.

Credit: www.whirlpool.com
Starting The Self-cleaning Process
When it comes to cleaning your oven, the self-cleaning feature can be a real game-changer. Not only does it save you time and effort, but it also ensures a thorough clean, eliminating the need for harsh chemicals. In this section, we will guide you through the process of starting the self-cleaning process, ensuring that you can achieve a sparkling clean oven with ease.
Setting The Controls
To start the self-cleaning process, you need to set the controls on your oven. Here’s a step-by-step guide on how to do it:
- Ensure that your oven is completely empty. Remove all racks, pans, and any other accessories before proceeding.
- Locate the self-cleaning button or option on your oven’s control panel. It is usually labeled as “Self Clean” or represented by an icon resembling a lock.
- Press the self-cleaning button or select the self-clean option. This will initiate the cleaning cycle.
- Set the cleaning duration. Some ovens allow you to choose the cleaning time, while others have a preset duration. Follow the manufacturer’s instructions to determine the appropriate cleaning duration for your oven.
- Once you have set the controls, make sure to close the oven door securely. The self-cleaning process will not start if the door is not properly closed.
Safety Measures During Operation
While the self-cleaning process is convenient, it is important to prioritize safety during operation. Here are some safety measures to keep in mind:
- Do not leave the oven unattended during the self-cleaning cycle. It is best to stay nearby and monitor the process.
- Keep children and pets away from the oven while it is self-cleaning. The high temperatures involved can cause burns.
- Avoid opening the oven door during the cleaning cycle. This can release hot air and potentially cause injury.
- Ensure proper ventilation in the kitchen. Open a window or turn on the exhaust fan to prevent the accumulation of smoke and odor.
- After the self-cleaning cycle is complete, allow the oven to cool down before attempting to open the door. This will prevent any potential burns.
Following these instructions will help you safely and effectively start the self-cleaning process on your oven. Remember to always refer to your oven’s user manual for specific instructions and guidelines.
After The Self-cleaning Cycle
After the self-cleaning cycle, it’s important to let the oven cool down completely before wiping away any remaining ash. Make sure to also clean the door and racks separately with warm, soapy water. Following these instructions will ensure your self-cleaning oven stays in top condition.
Cooling Down Time
After the self-cleaning cycle, it is essential to let the oven cool down before attempting to clean it. The oven can reach high temperatures during the cleaning cycle, and touching the surface immediately after the cycle can result in burns. It is recommended to wait for at least an hour before attempting to clean the oven. The cooling down time allows the oven to return to a safe temperature, making it easier and safer to wipe away any remaining residue.Wiping Out The Residue
Once the oven has cooled down, it is time to wipe out the residue. The self-cleaning cycle is designed to burn off any food debris and grease, leaving behind a fine ash residue. This residue can be easily wiped away using a damp cloth or sponge. It is important to avoid using abrasive cleaners or scrubbers as they can damage the oven’s surface. To ensure that all the residue is removed, wipe the oven’s interior with a clean, damp cloth several times. Following these instructions will help ensure that your oven stays in good condition and remains clean. Remember to always let the oven cool down before attempting to clean it and to use gentle cleaning methods to avoid damaging the surface. By following these steps, you can enjoy a self-cleaning oven that will keep your kitchen looking clean and tidy.Maintenance Between Cycles
Maintaining your self-cleaning oven is crucial for optimal performance. Follow these simple instructions to keep your oven clean and efficient between cycles.
Keeping your self-cleaning oven maintained between cycles is essential to extend the life of your appliance and ensure it works at its best. Here are some tips on how to maintain your self-cleaning oven between cycles.Regular Wipe-down Tips
Regularly wiping down your self-cleaning oven is an easy way to keep it clean and free from debris. Here are some tips for regular wipe-downs:- Wait for the oven to cool down before cleaning it.
- Use a damp cloth to wipe down the interior of the oven.
- Use a mild soap and water to clean the oven door.
- Wipe down the oven racks with a damp cloth and mild soap.
Managing Tough Stains
Even with regular wipe-downs, tough stains can still occur in your self-cleaning oven. Here are some tips for managing tough stains:- Mix baking soda and water to create a paste. Apply the paste to the stained area and let it sit for 30 minutes. Wipe away the paste with a damp cloth.
- For grease stains, mix equal parts vinegar and water in a spray bottle. Spray the affected area and let it sit for 10 minutes. Wipe away with a damp cloth.
- For burnt-on food, use a plastic scraper to gently remove the debris. Wipe the area with a damp cloth.
Common Questions Answered
When it comes to self-cleaning ovens, it’s natural to have some questions. In this section, we will address two common questions that often come up regarding self-cleaning ovens: the frequency of self-cleaning and its impact on the oven’s lifespan.
Frequency Of Self-cleaning
One of the first questions that people have is how often they should use the self-cleaning feature on their oven. The frequency of self-cleaning largely depends on how often you use your oven and the level of dirt and grime that accumulates over time. As a general guideline, it is recommended to use the self-cleaning function every three to six months, or whenever you notice a significant buildup of grease and food particles.
To determine the ideal frequency for your specific oven, consider the cooking habits in your household. If you frequently cook greasy or messy dishes, you may need to clean your oven more often. On the other hand, if you rarely use your oven, you can extend the time between self-cleaning cycles.
Impact On Oven Lifespan
Concerns about the impact of self-cleaning on the lifespan of an oven are also common. While self-cleaning does provide a convenient way to maintain the cleanliness of your oven, it can also put some strain on the appliance.
During the self-cleaning process, the oven heats up to high temperatures to burn off the residue. This intense heat can potentially cause wear and tear on the oven’s components, such as the heating elements and the door gasket. However, modern self-cleaning ovens are designed to withstand these high temperatures and have safety features in place to prevent damage.
It is worth noting that the frequency of self-cleaning can also affect the oven’s lifespan. Using the self-cleaning feature excessively may lead to accelerated wear and tear over time. Therefore, it is essential to follow the manufacturer’s recommendations and not overuse the self-cleaning function.
To maximize the lifespan of your oven, it is advisable to combine self-cleaning with regular manual cleaning. Wiping up spills and grease after each use and periodically cleaning the oven manually will help maintain its performance and extend its lifespan.
In conclusion, the frequency of self-cleaning depends on your oven usage and the level of dirt, while its impact on the oven’s lifespan is minimal when used according to the manufacturer’s recommendations. By finding the right balance between self-cleaning and manual cleaning, you can ensure that your oven remains in top condition for years to come.
Troubleshooting Self-cleaning Oven Issues
Need help troubleshooting self-cleaning oven issues? Follow the best self-cleaning oven instructions to ensure a smooth process. Start by checking the door latch, setting the right cleaning cycle, and addressing any error codes to keep your oven in top shape.
Dealing With Malfunctions
If you encounter any issues while using your self-cleaning oven, there are a few troubleshooting steps you can take to resolve the problem. Here are some common malfunctions and how to deal with them:
1. Oven not heating up:
- Check if the oven is properly plugged in and the circuit breaker is not tripped.
- Ensure that the oven door is closed securely as it may not heat up if the door is not properly latched.
- Verify that the temperature settings are correct and adjust them if necessary.
2. Self-cleaning cycle not starting:
- Make sure that the oven door is completely closed and latched, as the self-cleaning cycle will not initiate if the door is open or not properly sealed.
- Check if the oven’s self-cleaning feature is activated. Refer to the manufacturer’s manual for instructions on how to activate the self-cleaning cycle.
- Ensure that the oven’s clock is set to the correct time, as some models require the clock to be set for the self-cleaning cycle to start.
3. Smoke or strong odor during self-cleaning:
- Remove any visible food debris or spills from the oven before starting the self-cleaning cycle.
- Avoid using excessive amounts of cleaning solution or oven cleaner, as this can cause smoke or strong odors during the self-cleaning process.
- Ensure proper ventilation in the kitchen area by opening windows or turning on exhaust fans to dissipate any smoke or odors.
When To Call A Professional
While troubleshooting can help resolve minor issues with your self-cleaning oven, there are certain situations where it is best to seek professional assistance. Consider reaching out to a professional if you encounter any of the following problems:
- The oven is not heating up even after troubleshooting steps have been followed.
- The self-cleaning cycle is not functioning properly, and the issue persists despite troubleshooting efforts.
- There are visible signs of damage or malfunction, such as sparks, flames, or unusual noises.
- You are unsure about how to address a specific issue or feel uncomfortable attempting to troubleshoot it yourself.
Remember, safety should always be a top priority when dealing with any appliance malfunctions. If in doubt, it is best to consult a professional to avoid any potential risks or further damage to your self-cleaning oven.
Alternatives To Self-cleaning Ovens
When it comes to cleaning your oven, self-cleaning options are not the only solution. There are alternatives to self-cleaning ovens that can be effective and convenient. These alternatives offer different cleaning methods that suit various needs and preferences. Let’s explore some of the popular alternatives to self-cleaning ovens below.
Steam Cleaning Ovens
Steam cleaning ovens are a popular alternative to self-cleaning ovens. They use the power of steam to soften and loosen food residue, making it easier to wipe away. This method is less aggressive than self-cleaning, as it doesn’t involve high heat or fumes. It’s a quicker and more environmentally friendly option, making it ideal for regular maintenance.
Traditional Cleaning Methods
Traditional cleaning methods, such as using baking soda and vinegar or a commercial oven cleaner, are effective alternatives to self-cleaning ovens. These methods involve manually scrubbing the oven with a cleaning solution to remove grease and food buildup. While they require more effort than self-cleaning or steam cleaning, they offer a more hands-on approach and allow for greater control over the cleaning process.
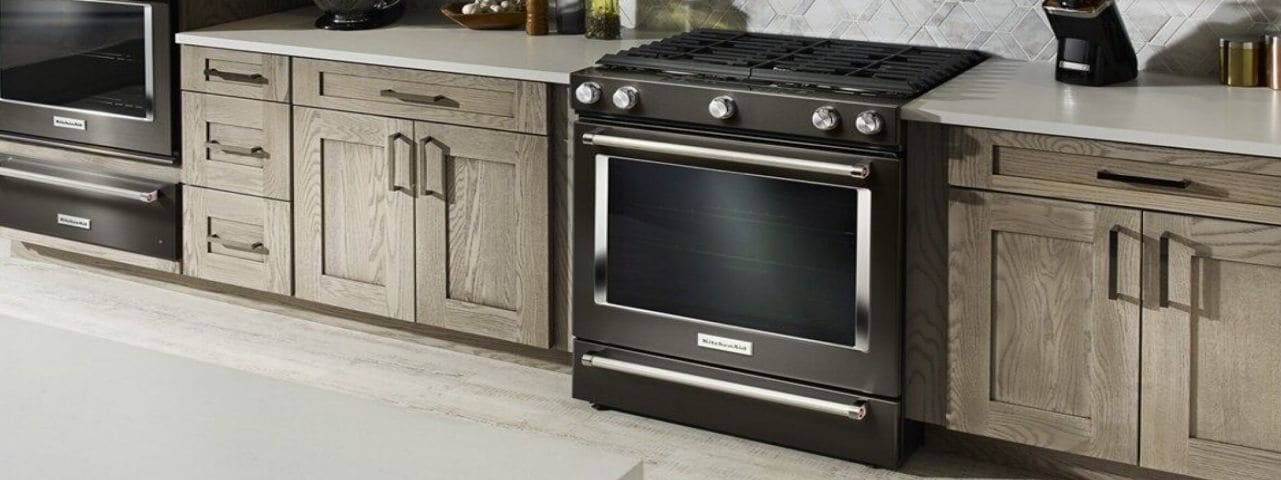
Credit: www.kitchenaid.com
Conclusion: Is A Self-cleaning Oven Right For You?
When considering whether a self-cleaning oven is the right choice for your household, it’s important to weigh the pros and cons, and make an informed decision based on your specific needs and priorities.
Weighing The Pros And Cons
Here’s a comparison of the advantages and disadvantages of self-cleaning ovens:
| Pros | Cons |
|---|---|
| Eliminates the need for harsh chemical cleaners | High temperatures during self-cleaning cycle can produce strong odors |
| Convenient and time-saving | Energy-intensive during the self-cleaning process |
| Helps maintain a clean and hygienic oven interior | Potential risk of damage to oven components during self-cleaning cycle |
Making The Informed Decision
Considering your cooking habits, lifestyle, and environmental concerns, you can now make an informed decision about whether a self-cleaning oven is the right choice for you. Remember to prioritize safety and efficiency when making this important appliance decision.

Credit: www.youtube.com
Frequently Asked Questions
How To Properly Use A Self-cleaning Oven?
To use a self-cleaning oven, remove racks and wipe loose debris. Follow manufacturer’s instructions for setting the cleaning cycle. Ensure good ventilation and keep children and pets away. After the cycle, wipe away ash residue and clean the racks separately.
Avoid using oven cleaners in a self-cleaning oven.
Can I Leave The Racks In The Oven When I Self-clean?
Yes, you can leave the racks in the oven when you self-clean.
Can You Leave The House While The Oven Is Self-cleaning?
Yes, it is safe to leave the house while the oven is self-cleaning. However, it is recommended to stay at home and keep an eye on the oven during the self-cleaning process, as it can produce smoke and strong odors.
Make sure to remove any flammable objects from the area around the oven and keep pets and children away.
What Is The Best Way To Clean A Really Dirty Self-cleaning Oven?
To clean a really dirty self-cleaning oven, start by removing racks and using a non-abrasive cleaner on the interior. Then run the self-cleaning cycle. Wipe away the ash residue afterward. Regular maintenance will help prevent heavy buildup in the future.
Conclusion
Mastering the self-cleaning feature of your oven can be a game-changer in maintaining a clean and efficient kitchen. By following the provided instructions and safety precautions, you can effortlessly remove grease, grime, and food residue, ensuring a spotless and odor-free cooking environment.
With these easy-to-follow steps, you’ll be able to enjoy the convenience of a self-cleaning oven while keeping it in top-notch condition. Happy cooking!